Pages

Thursday, January 31, 2013

February 2013 FREE Printable Calendar - by Hello Cuteness


This is a really cute FREE printable calendar from Hello Cuteness.  Click the calendar image to be taken to her blog where you can print.


Did you know even alligators get a little swoon-y when it comes to all things LOVE?


Sunday, January 20, 2013

Easy Way to Match Threads at the Thread/Fabric Store

What do you do when you are working on a project, run out of a particular color of thread but need to go get more?  You could take your project with you to match the thread but who wants to do that?  What I do when I buy my threads is take a fine point Sharpie permanent marker and write the color number from the round end sticker onto the side of the spool.  This is great for those that buy thread online because sometimes the colors aren't "True & Exact" online and you may end up buying the wrong shade.


When that spool runs out and I am still working on my project I also quickly write down the type of color it is so that I can quickly zone in on the color family that I am looking for when I go to get more thread.

DO ANY OF YALL DO ANYTHING LIKE THIS?

Sweet Treats Quilted Minky Blanket for my Neice Yasmine

For a few years now I have made Minky Blankets for my nephew Yusof and neices Yara & Yasmine.  The way that I did them in the past is I sewed the fabric right sides together, turned them right side out then sewed the opening closed.  This is okay for using 2 minky fabrics but not so good for cotton and minky because of all the static created between the layers & the shifting of the fabrics getting all bunched up.

My new way of making the blankets is just like a quilt but without batting.  Thisparticular one ended up about 44"x67".


 I USED HOT PINK DIMPLE DOT MINKY FOR THE BACK

 BINDING WAS ATTACHED & FINISHED BY MACHINE

 I USED A 1/8" STRAIGHT TOPSTITCH TO FINISH THE BINDING

 MY TWIN REALLY LIKES ROUNDED CORNERS

I DID BASIC FREE MOTION QUILTING USING RANDOM 5" SHAPES IN CIRCLES, SQUARES & HAD TO INCLUDE HEARTS BECAUSE I LOVE MY NEICE.  CAN YOU SEE THEM?  MY TEMPLATES WERE THE BOTTOM OF A HALF GALLON ALMOND MILK CONTAINER, THE ROUND PLASTIC TOP FROM A RAISIN CONTAINER AND THE HEART WAS FROM THE ZIPPER COIN PURSES I MADE IN MY PREVIOUS POST.

This is the best blanket so far that I have made for my twin's kids.  Doing it like a quilt does take longer but it looks way better.

Serged Minky Washcloths + Perfect Serger Settings for Serging Minky

My twin asked me to make some minky washcloths for her friend that is having their first child.  In the past I made several of these for my twin to use on my nephew and nieces.  They love them.  The kids use them for every bath and in the morning to wet wipe their faces.  The ones I made in the past were not made with a serger.  I did sew an "X" across the middle but zigzagged the edges then trimmed.  Using my serger to make these was so easy and made them look so much better.

 Being that the baby is a boy, I decided to go with bright primary colors.  The circle minky on the right were scraps from my nephew's minky blanket, therefore they are smaller.  The larger ones are right at 6" square.  Smaller ones are like 5".

FOR FINISHING OFF THE SERGER ENDS, SEE MY TUTORIAL HERE.

I must admit that I did have a little trouble at the beginning when I was practicing with some minky scraps.  I couldn't find anything online talking about the perfect serger settings for minky fabric.  So here I am sharing a sewing tip with you!  Granted my machine is a Brother 1034D but I think these settings would be pretty universal within a smidget or so.

 NOTICE WHERE THE NOTCHES LINE UP NEXT TO THE NUMBERS.  ZOOM IN IF YOU NEED TO.

I HOPE THIS HAS HELPED!


Valentine's Day 2013 - Heart & Circle Zipper Earbud/Coin Pouches + 6 Sewing Tips

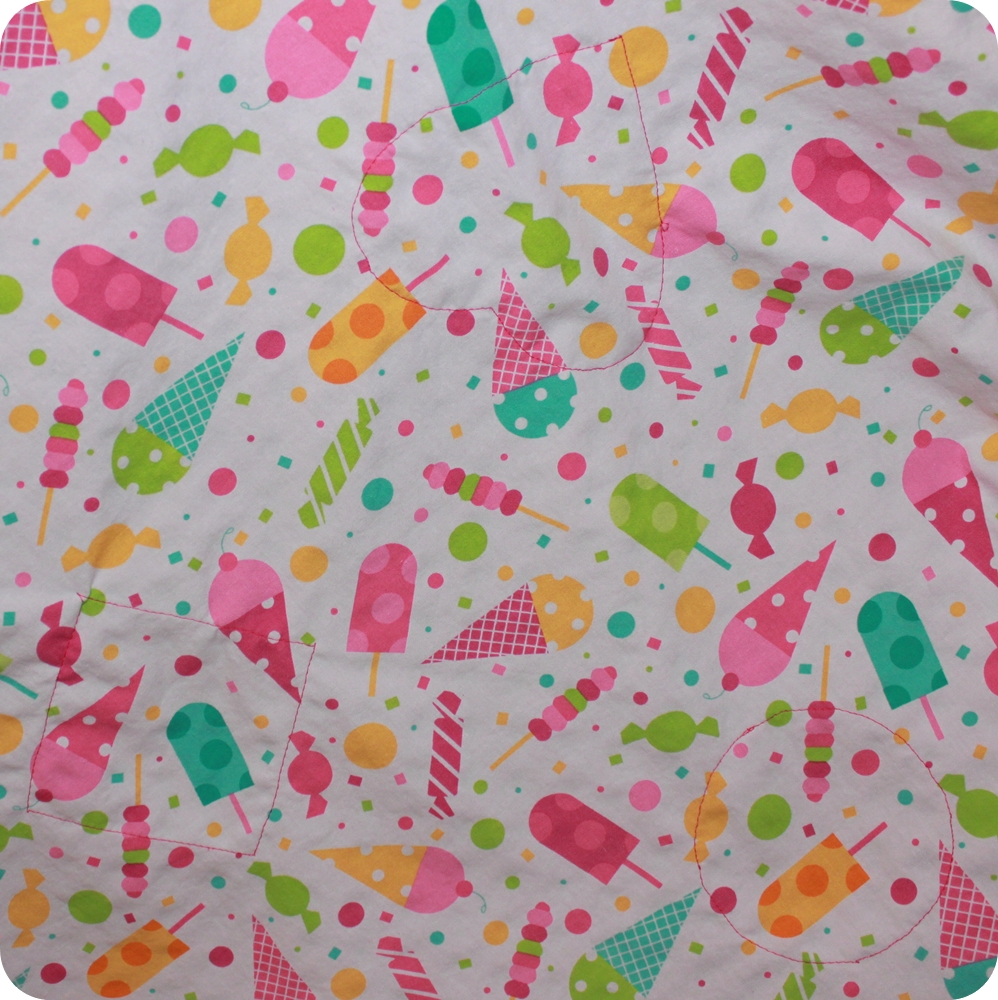
This was my first time making circle and heart shaped zipper pouches.  I used the Circle & Heart Tutorials by Dog Under my Desk Blog.  I made several of each for my twin sister to give to her friends.  INDOOR LIGHTING SUCKS!

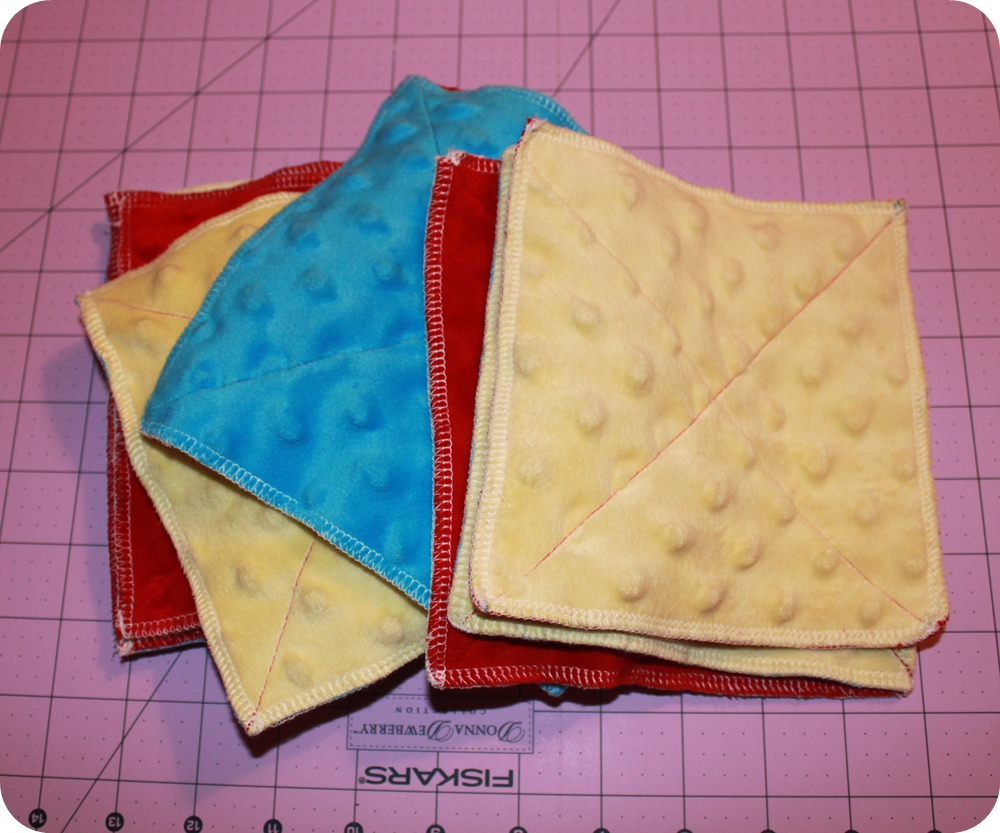
The tutorial called for batting.  I started with Warm & Natural then realized I couldn't topstitch around the edges because it was too thick.  Then I tried flannel as a batting, still couldn't topstitch, couldn't get the zipper parts of the pouch under my sewing foot.  Oh well.


 THIS ABOVE WAS MY VERY FIRST ONE.  I GOT CONFUSED WITH THE FABRIC PLACEMENT SO ENDED UP WITH A DOUBLE FRONT LOOK.  I KINDA LIKE IT BUT MADE SURE THE REST OF MY FABRICS WERE PLACED THE RIGHT WAY.


 I DID THE OPPOSITE OF THE TUTORIAL AND MADE MY POUCHES FOR "LEFTIES" BUT "RIGHTIES" CAN USE THEM AS WELL.


NOW FOR THE SEWING TIPS:  PLEASE IGNORE MY OLD IRONING TOWEL.  MY REGULAR IRONING SURFACE WAS IN BETWEEN SHIFTS IN THE LAUNDRY.

#1 - LESS WORK

 SINCE YOU ARE GOING TO BE CUTTING OUT 2 OF THE SAME SHAPE, 1 JUST HAPPENS TO BE SLIP................PUT YOUR 2 PIECES OF BATTING, LINING FABRIC OR OUTER FABRIC ON TOP OF EACH OTHER.  TRACE ONE FULL SHAPE THEN TAKE THE SMALL LOWER TEMPLATE PIECE AND DRAW THE LINE DOWN THE CENTER.  CUT OUT THE ENTIRE SHAPE FOR THE 2 FABRICS THEN TAKE THE TOP PIECE AND CUT DOWN THE LINE.

ABOVE YOU SEE MY 2 FLANNEL BATTING LAYERSBELOW ARE 2 OUTER FABRIC LAYERS BUT I DREW ON ONLY 1.


#2 - DON'T BURN YOURSELF!

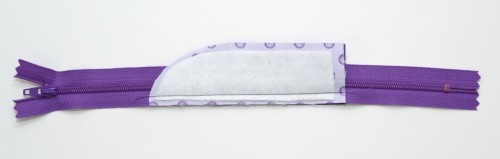
FOR IRONING THE SMALL TAB PIECES OR ANY SMALL PIECES IN OTHER PROJECTS HOLD DOWN THE FABRIC WITH YOUR METAL SEAM GAUGE THEN PUT YOUR IRON ON TOP.

#3 - LOOK BOTH WAYS BEFORE CROSSING THE RAILROAD TRACKS

I FOUND IT EASIER TO INSERT PINS ON BOTH SIDES OF THE ZIPPER AREA THAT I WILL BE "TACKING".  THIS HELPS TO HOLD THE PIECES TOGETHER AS I SEW & BACKSTITCH.  I INSERTED MY PINS RIGHT NEXT TO THE ZIPPER TEETH.

#4 - EASIER PIVOTING POINT

 I FOUND IT EASIER TO MARK A LINE WITH MY MARK B GONE WATER SOLUBLE MARKER SO THAT I KNOW EXACTLY WHERE TO PIVOT AT THE TOP OF THE HEART INSTEAD OF GUESSING WHEN I GOT THERE.

ABOVE YOU CAN SEE THAT THIS LINE MAKES SEWING THE PIVOT SO MUCH EASIER!

#5 - ARE YOU A "LEFTIE" OR A "RIGHTIE"?

 THIS IS HOW YOUR LAYERING WILL LOOK IF YOU ARE MAKING THIS HEART FOR A LEFTIE.

THIS ABOVE PICTURE IS FROM THE TUTORIAL BLOG POST ON DOG UNDER MY DESK.  SEE HOW HER PLACEMENT AND MY PLACEMENT ARE DIFFERENT?


IF YOU ARE MAKING THIS POUCH FOR A LEFTIE, JUST FLIP THE TEMPLATE PIECES OVER.

#6 - TIME TO SLIP THAT RING ON

 I FOUND IT EASIER TO SLIP THE KEYRINGS THROUGH THE FABRIC TABS BY USING MY THREAD NIPPERS.  I INSERTED MY THREAD NIPPERS AT THE VERY BEGINNING OF THE OPENING....................

 ......................THEN I SLID THE TAB OPENING ONTO THE KEYRING OPENING.  THEN I WORKED THE KEYRING PART ALL THE WAY THRU THE FABRIC TAB.

I HOPE THESE TIPS HAVE HELPED!


Monday, January 14, 2013

GiveAway #45 - Ticklish by Me & My Sister Designs Charm Pack

It's that time again for the monthly GiveAway sponsored by our lovely friends at Fat Quarter Shop!


This month I am giving away a yummy Ticklish Charm Pack by Me & My Sister Designs

There are (42) squares in the pack

HERE IS WHAT ALL THE FABRICS LOOK LIKE.  BELOW PICTURE IS THE FAT QUARTER BUNDLE.

TICKLISH ALSO COMES IN A LAYER CAKE & JELLY ROLL.  CLICK ANY OF THE IMAGES FOR MORE DETAILS & PRICING.

Who doesn't love a chance to win some FREE Fabric?  9 Chances to Win!  Here's what you do:
#1 IS REQUIRED.  #2 - #9 ARE JUST EXTRA ENTRIES. "FOLLOWING" OR "LIKING" IS ONLY IF YOU WANT TO.  

Please leave a separate comment for each of the below.  It's easier to keep track of the entries that way.  This GiveAway will run for a work week from (Tue) 1/15 thru (Sat) 1/19 @ midnight EST.  I will use Random.org to choose the winner & will announce the winner on (Sun) 1/20!
  1. Let us know if you sleep with socks on in the winter!  Easy Peasy!  I DO!
  2. Become a KoolBeenz follower via Google Friend Connect or RSS Feed, comment that you now follow or already do
  3. "like" Fat Quarter Shop on FaceBook, comment that you did or already did
  4. Add my Blog Button to your blog's sidebar or anywhere else, comment that you did or already did
  5. Blog the Give-Away, comment that you did
  6. Spread the word on your FaceBook wall, comment that you did
  7. Become a Jolly Jabber blog follower, comment that you now follow or already do
  8. Tweet the Give-Away, comment that you did
  9. If you would like to be added to KoolBeenz' Give-Away email newsletter to be notified of future Give-Aways, please enter your email address at the top right hand corner of my blog.  If you already are on the email list, let us know that too.  You will receive emails ONLY about Give-Aways, nothing more, I promise.
Let the Commenting Begin!

GiveAway #44 - In Color Order Lined Drawstring Bag Pattern (8 bag sizes)

I used the awesome pattern by In Color Order to make my Valentine's Day drawstring bags for my twin.  These bags are so awesome to make that I wanted to share the bag love with yall!  3 lucky winners will get a copy of the pattern that includes 8 different bag sizes!  And let me tell ya, the instructions are so freaking easy to follow!  HERE IS MY TUTORIAL ON HOW TO USE 2 OR 3 DIRECTIONAL FABRICS PER BAG, PATTERN ONLY DISCUSSES USING 1 PER BAG.


HOW TO ENTER:
Just tell me if this would be your first time making a drawstring bag or if you have made them before.  Easy Peasy!
  
This GiveAway will run for a work week from (Tue) 1/15 thru (Sat) 1/19 @ midnight EST.  I will use Random.org to choose the winners & will announce the winner on (Sun) 1/20!

YOU ARE MORE THAN WELCOME TO SHARE THIS GIVEAWAY WITH OTHERS, BUT NOT REQUIRED TO ENTER!

IF YOU WOULD LIKE TO BE NOTIFIED OF FUTURE GIVEAWAYS, PLEASE ENTER YOUR EMAIL ADDRESS AT THE TOP RIGHT HAND CORNER OF MY BLOG.


Valentine's Day 2013 - Fabric Gift Bags & Envelope Style Pillow Covers + Sewing Tip

2 of the projects my twin wanted me to make was some fabric gift bags for her to sell at her Valentine's Day Open House and she also wanted (5) 18" Valentine's Day envelope style pillow covers.  She picked out all the fabrics, except for some I had leftover from something else which is shown at the end of the post.

The 2 fabrics she ordered online for her pillow covers are:

 LOVE BIRDS - I THOUGHT THIS WAS VERY CUTE

RANDOM FLOATING HEARTS - IT LOOKS LIKE THEY ARE BOTH FROM THE SAME COLLECTION BECAUSE OF THE DAISY FLOWERS WITH HEART CENTERS.


I chose to match them up with medium & hot pink for the backs since she wanted solid backs.  I didn't have a pillow insert to show you what they really look like.  I serged all around the outside seam with my new Brother 1034D serger that she bought me.  I AM TOTALLY LOVING MY SERGER!

 QTY 1 WITH HOT PINK

QTY 1 WITH MEDIUM PINK

 QTY 1 WITH HOT PINK

QTY 2 WITH MEDIUM PINK

ONE OF THE LOVEBIRD PILLOW COVERS I HAD TO PIECE A 3 INCH STRIP TO THE LARGER PIECE TO MAKE A LARGE ENOUGH SQUARE.  CAN YOU TELL WHERE THE SEAM LINE IS?  I TRIED MY BEST TO MATCH IT UP SO THAT IT WOULD BE HARD TO DETECT.  I THINK I DID A PRETTY GOOD JOB.

TIP I WOULD LIKE TO SHARE WHEN MAKING ENVELOPE PILLOW COVERS

THE PART THAT TAKES THE MOST STRESS IS WHERE THE ENVELOPE OPENING IS ATTACHED TO THE FRONT.  SO WHAT I DO IS BACKSTITCH WHERE BOTH PIECES' FOLDED EDGE MEETS THE FRONT PIECE.  I HOPE THE PICTURE ABOVE SHOWS UP WELL WHAT I'M TALKING ABOUT.

========================================

Now, I made 83 fabric gift bags that are 6" wide by 8" high.  I serged all the seams and pinked the top edges.  She sells them with ribbon ties and gift tags that she makes on her Cricut or that she prints & punches out with a puncher.

 QTY 14: SPARKLY FABRIC, VERY CUTE

 QTY 14: I THOUGHT THIS WAS CUTE, THOUGH WISH IT HAD BEEN THICKER FABRIC

 QTY 14: SPARKLY FABRIC, VERY NICE

 QTY 14: GOTTA HAVE THAT BRIGHT RED

QTY 14: SPARKLY PARISIAN PERFUME BOTTLES

 QTY 4: FABRIC I HAD LEFTOVER

 QTY 6: FABRIC I HAD LEFTOVER

 QTY 4: FABRIC I HAD LEFTOVER

QTY 2: FABRIC I HAD LEFTOVER


Related Posts Plugin for WordPress, Blogger...